
itl.gwu.edu | (202) 994-0485
How to Record a Video Presentation using Zoom
While Zoom is a great way to conduct online meetings and webinars, you can also use it to create
instructional videos for your students. Using Zoom, you can record a video of yourself sharing content from
your computer like a PowerPoint presentation, a Word or Excel file, or a webpage.
1. Launch Zoom. Open the Zoom application on your computer and click New Meeting. If prompted, select
Join With Computer Audio.
2. Start your Video. Click Start Video to record a video of yourself alongside any content you share.
3. Open presentation materials. Open any files and programs you plan to use in your presentation and
close anything you won’t use to facilitate smoother transitions when switching between content. If you
don’t plan to use something right away, minimize its window until you’re ready.
Note: Remember to close anything confidential that you don’t want in the recording like emails and grades.
4. Share Content. Click on Share Screen. In the window, select what you want to share and click Share. If
you plan to bounce around from item to item, sharing your desktop is a good option.
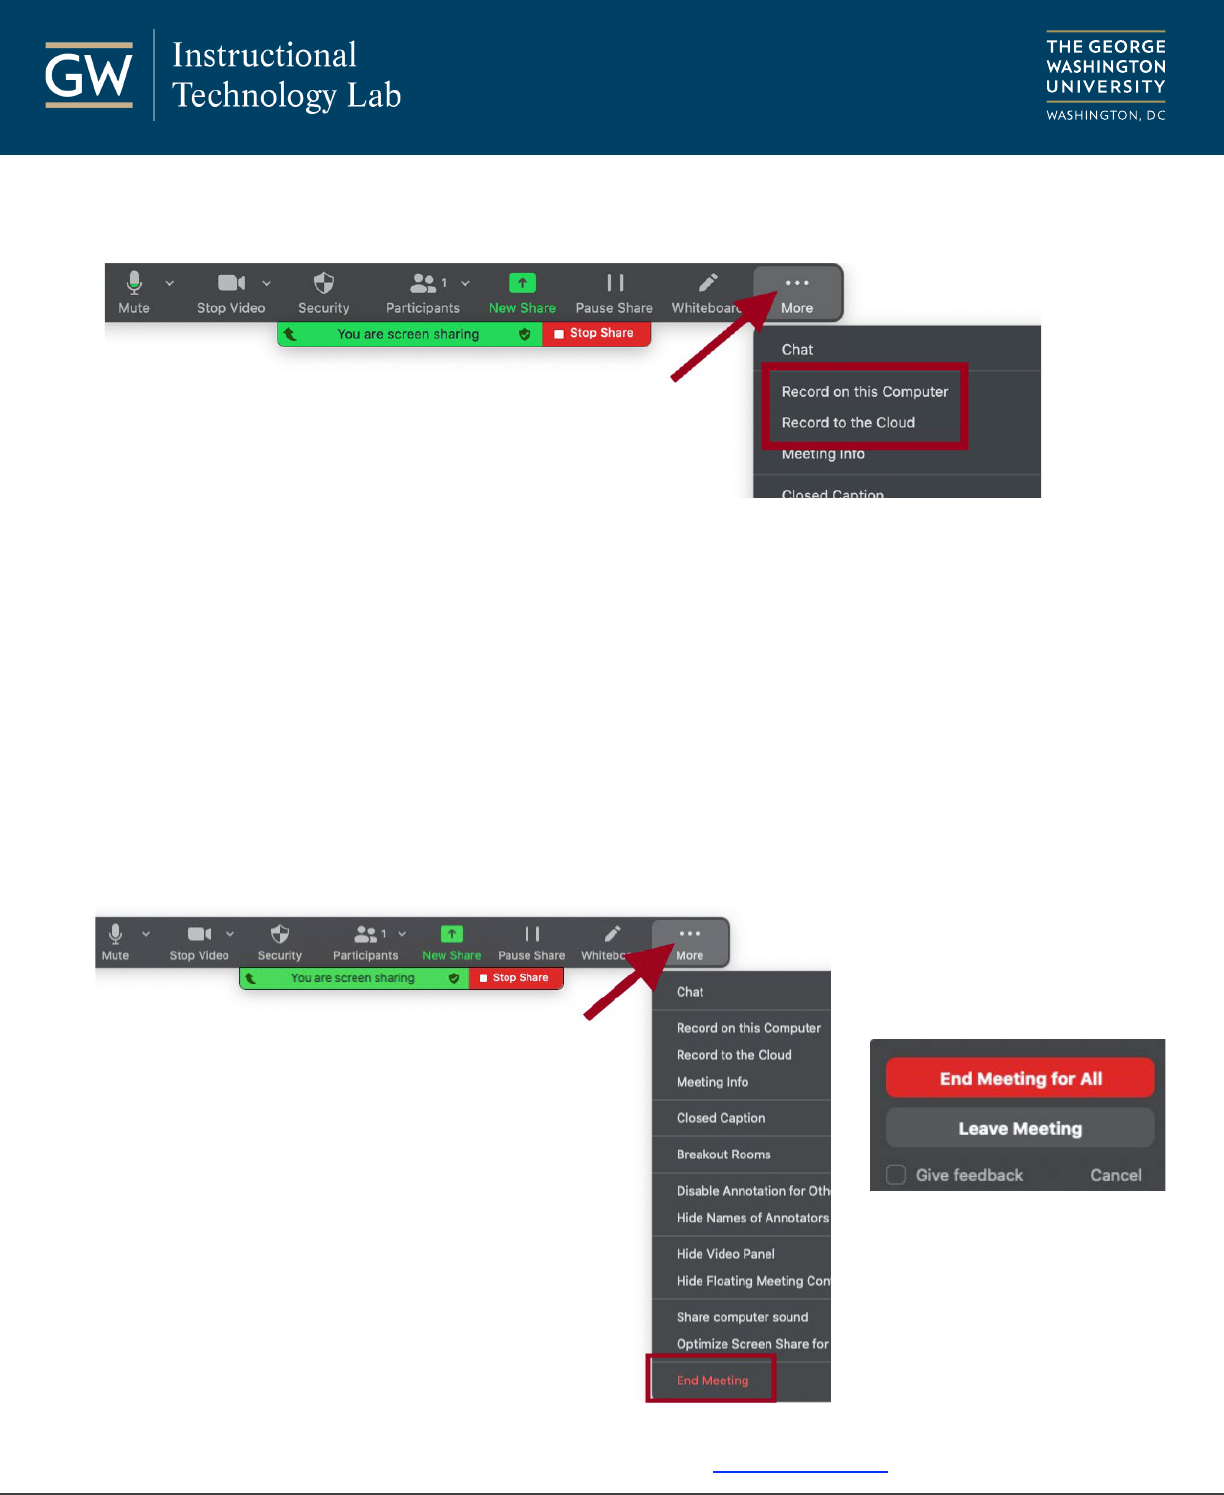
5. Record. Click More in the toolbar and choose to Record to the Cloud or Record on this computer. A
blinking indicator in the top left of the session indicates when you are recording.
• Record on this computer: Zoom converts the recording and saves it to your
computer’s Documents folder in a folder named Zoom.
• Record to the Cloud: Zoom converts the recording and saves it in your Zoom
account. You receive an email when it is ready.
itl@gwu.edu | (202) 994-0485
6. Start your presentation and begin to navigate through your content. Zoom records your video and
screen the entire time.
7. End the Meeting. Click More in the toolbar, select End Meeting, and choose End meeting for All.
For additional Zoom resources, visit it.gwu.edu/zoom.
